Are you ready to take your taste buds on an unforgettable journey? Look no further than the Reese’s Peanut Butter Earthquake Cake—a dessert so decadent, it’s bound to shake up your world! This peanut butter lover’s dream combines rich chocolate, creamy peanut butter, and a gooey center that will leave everyone asking for seconds. In this article, we’ll dive deep into what makes this cake so irresistible, provide a step-by-step guide to making it at home, and share some pro tips to ensure your creation is nothing short of spectacular.
What Is Reese’s Peanut Butter Earthquake Cake?
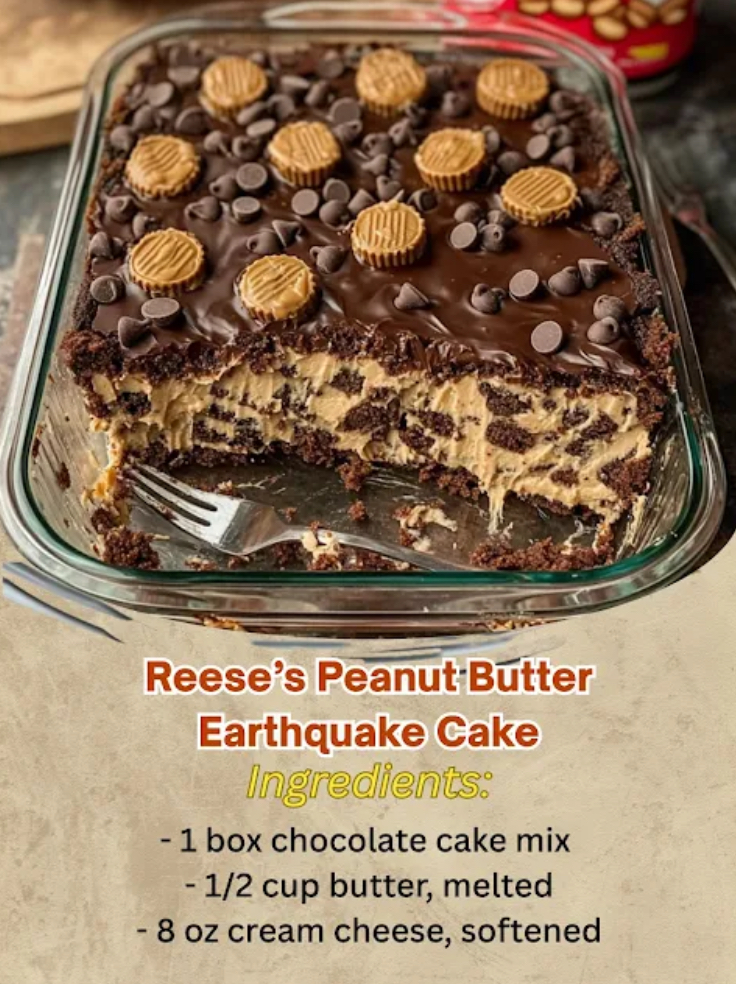
The Reese’s Peanut Butter Earthquake Cake is not just another dessert—it’s a celebration of flavors and textures. Imagine biting into a soft, moist chocolate cake only to discover pockets of warm, melty peanut butter cups hidden inside. As you cut into the cake, the peanut butter oozes out like molten gold, creating a “tremor” of flavor sensations. It’s sweet, nutty, indulgent, and utterly addictive.
This dessert has quickly become a viral sensation on social media platforms like TikTok and Instagram, with bakers from all over sharing their versions of this peanut butter paradise. Whether you’re hosting a party or simply craving something special, this cake is sure to impress anyone who loves peanut butter and chocolate.
Why You Should Try Making This Cake
- It’s Fun to Make : The surprise element of hidden peanut butter cups adds excitement to both the baking process and the final reveal.
- Perfect for Parties : Its dramatic presentation makes it ideal for birthdays, holidays, or any occasion where you want to make a statement.
- Customizable : Feel free to add extra touches, such as whipped cream, caramel sauce, or even crushed peanuts for extra crunch.
- Adorable Photos : Who doesn’t love taking pictures of food that looks (and tastes) amazing? This cake is practically begging to be shared online.
How to Make Reese’s Peanut Butter Earthquake Cake
Don’t worry if you’re new to baking—this recipe is surprisingly easy to follow. With just a few simple steps, you can create a masterpiece that rivals anything you’d find in a bakery.
Ingredients
- 1 box of chocolate cake mix (plus ingredients specified on the package)
- 24–30 Reese’s Peanut Butter Cups (mini or regular size)
- Optional toppings: powdered sugar, whipped cream, caramel drizzle, or chopped peanuts
Instructions
- Preheat Your Oven : Set your oven to the temperature recommended on the cake mix packaging (usually around 350°F/175°C).
- Prepare the Cake Batter : Follow the instructions on the cake mix box to prepare the batter. Pour half of the batter into a greased bundt pan or round cake pan.
- Add the Peanut Butter Cups : Place the Reese’s Peanut Butter Cups evenly across the surface of the first layer of batter. Be careful not to overcrowd them; they need space to melt and create those delicious pockets of goodness.
- Cover with Remaining Batter : Carefully pour the rest of the cake batter over the peanut butter cups. Use a spatula or spoon to gently smooth it out, ensuring the cups are fully covered but still close enough to the top for the melted peanut butter to seep through during baking.
- Bake Until Done : Bake according to the time specified on the cake mix box, usually about 35–45 minutes. To check if it’s done, insert a toothpick into the center of the cake. If it comes out clean (except for melted peanut butter), it’s ready!
- Cool Completely : Let the cake cool in the pan for about 10 minutes before transferring it to a wire rack to cool completely. Cooling ensures the peanut butter centers set slightly without making a mess when slicing.
- Serve and Enjoy : Slice the cake carefully to reveal the gooey peanut butter surprises within. Garnish with your favorite toppings for added flair.
Tips for Success
- Choose Quality Ingredients : While store-bought cake mixes work perfectly fine, consider upgrading to premium Reese’s Peanut Butter Cups for maximum flavor impact.
- Experiment with Sizes : For a more dramatic effect, use larger peanut butter cups. Mini cups, however, are great for smaller portions or distributing the gooey goodness throughout the cake.
- Let It Rest : After baking, allow the cake to sit for a few minutes before unmolding. This helps maintain its structure and prevents crumbling.
- Freeze Leftovers : If you have leftovers (unlikely!), wrap slices tightly in plastic wrap and freeze them for up to two months. Simply thaw and reheat in the microwave for a fresh-from-the-oven experience.
Variations to Try
Once you’ve mastered the classic version, feel free to experiment with these fun variations:
- Salted Caramel Drizzle : Add a salty-sweet twist by drizzling caramel sauce over each slice.
- Peanut Butter Frosting : Swap traditional frosting for a homemade peanut butter frosting for double the nutty goodness.
- Chocolate Ganache Glaze : Pour a layer of rich chocolate ganache over the top for an elegant finish.
- Nutty Topping : Sprinkle crushed peanuts or pretzels over the finished cake for extra texture.
Conclusion
The Reese’s Peanut Butter Earthquake Cake is more than just a dessert—it’s a sensory experience that brings joy to anyone lucky enough to try it. Whether you’re a seasoned baker or a beginner, this recipe offers a delightful challenge that results in pure satisfaction. So why wait? Gather your ingredients, preheat your oven, and get ready to create a dessert that’s truly out of this world!


