
Why You’ll Love This Recipe
- Minimal Ingredients : Only milk, yogurt, and lemon are needed—no fancy equipment or additives.
- Fresh & Healthy : No preservatives or artificial flavors; you control the quality of every ingredient.
- Versatile : Use it in recipes, crumble it over salads, or enjoy it plain with a sprinkle of salt.
- Quick & Easy : Ready in under an hour with no special skills required.
- Customizable : Add herbs, spices, or seasonings to suit your taste.
Ingredients You’ll Need
Makes about 200–250g (7–9 oz) of cheese
- 1 liter (4 cups) whole milk (preferably full-fat for creamier cheese)
- 1 small plain yogurt (about 1/4 cup, unsweetened)
- Juice of half a lemon (or about 2–3 tbsp, adjust as needed)
- Optional : Salt, herbs, or spices for flavoring
Step-by-Step Instructions
Step 1: Heat the Milk
- Pour the milk into a heavy-bottomed pot and heat it over medium heat, stirring occasionally to prevent scorching.
- Bring the milk to a gentle boil (small bubbles will form around the edges). Do not let it boil over.
Step 2: Add the Yogurt
- Once the milk is hot but not boiling, reduce the heat to low. Stir in the yogurt and mix well until fully incorporated.
- The yogurt introduces live cultures that help curdle the milk gently, creating a soft, smooth texture.
Step 3: Add the Lemon Juice
- Slowly pour in the lemon juice while stirring gently. You’ll notice the milk beginning to separate into curds (solid parts) and whey (liquid parts).
- If the milk doesn’t fully curdle, add a little more lemon juice, 1 teaspoon at a time, until the separation is complete.
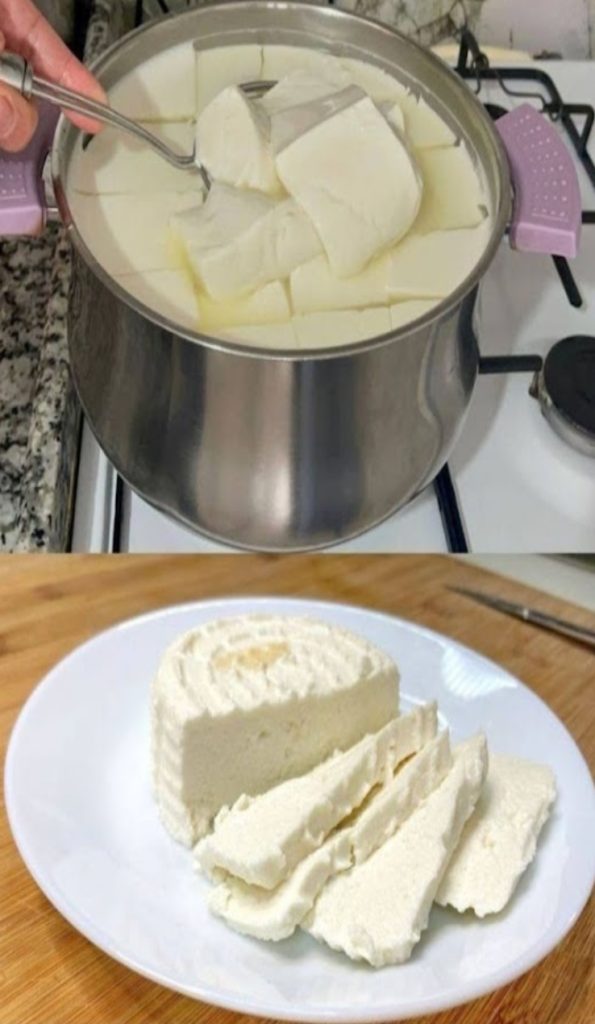
Step 4: Strain the Curds
- Line a colander with cheesecloth or a clean kitchen towel and place it over a bowl to catch the whey.
- Carefully ladle the curds into the colander, allowing the whey to drain away. Let the cheese sit for 10–15 minutes to remove excess liquid.
Step 5: Shape the Cheese
- Gather the edges of the cheesecloth and gently press the cheese to remove more whey if desired. For firmer cheese, tie the cloth and place a weight (like a heavy can) on top for 30 minutes to an hour.
- For softer cheese, simply shape it into a block or ball and unwrap it after draining.
Step 6: Season and Serve
- Sprinkle with salt or mix in herbs like parsley, dill, or cilantro for extra flavor.
- Store the cheese in an airtight container in the fridge for up to 3–4 days.
Why This Recipe Works
- Yogurt Culture : The yogurt acts as a natural starter, introducing beneficial bacteria that help coagulate the milk.
- Lemon Acid : The acidity of lemon juice causes the milk proteins (casein) to curdle, separating the curds from the whey.
- Versatility : The texture can be adjusted from soft and crumbly to firm and sliceable depending on how much whey you drain.
Variations to Try
- Herbed Cheese : Mix in chopped fresh herbs like basil, chives, or mint for a flavorful twist.
- Spiced Cheese : Add cumin, black pepper, or chili flakes for a savory kick.
- Sweet Cheese : Omit the salt and add honey, cinnamon, or dried fruits for a dessert-worthy treat.
- Ricotta-Style : Reserve the whey and reheat it with a splash of milk to make ricotta-like cheese.
- Vegan Version : Substitute plant-based milk and acid (like apple cider vinegar) for a vegan-friendly option.
Tips for Success
- Use Full-Fat Milk : Whole milk produces creamier, richer cheese compared to low-fat or skim milk.
- Avoid Overheating : Boiling the milk too vigorously can cause it to stick to the pot or burn.
- Save the Whey : Use the leftover whey in smoothies, soups, or baking—it’s packed with nutrients!
Serving Suggestions
- Romantic Touch : Drizzle with olive oil, sprinkle with sea salt, and serve with crusty bread or crackers.
- Brunch Staple : Pair with fresh fruit, nuts, or honey for a light breakfast or snack.
- Cooking Ingredient : Crumble it into salads, use it in sandwiches, or stir it into curries and pasta dishes.
Final Thoughts
This Homemade Cheese with Milk, Yogurt, and Lemon is a celebration of simplicity, freshness, and homemade goodness, offering a dish that feels indulgent yet approachable. With its customizable options, endless charm, and ease of preparation, it’s a recipe that’s sure to impress whether you’re cooking for a special occasion, a casual snack, or simply craving something satisfying.
Your Turn! Have you ever made homemade cheese or experimented with simple dairy recipes? Share your favorite variations or serving ideas below.


